

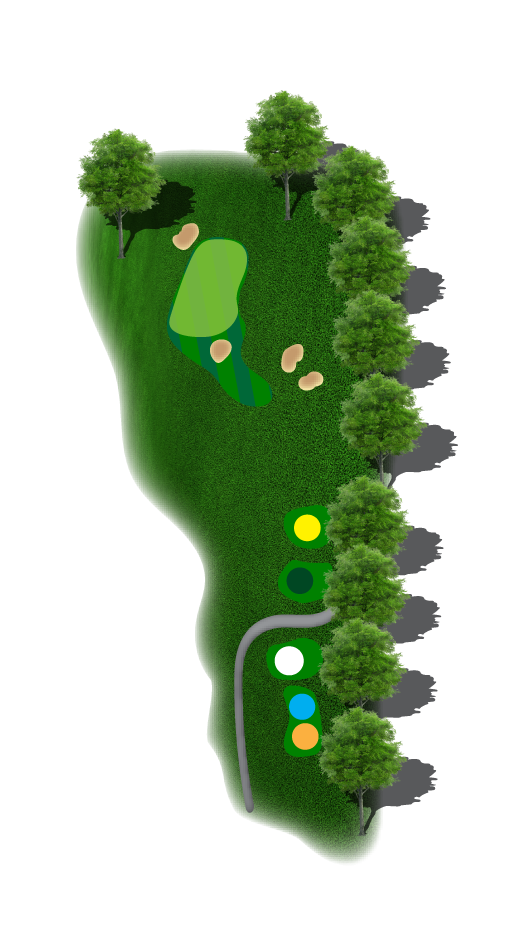
HOLE 1 – PAR 4
The Simpsons: Dogleg left. Keep your drive right of center to open up the approach. Play away from the front-left bunker to a fast, back-to-front green.
Gold: 360 | Blue: 340 | White: 315 | Red: 300 | Yellow: 270
Handicap: 15

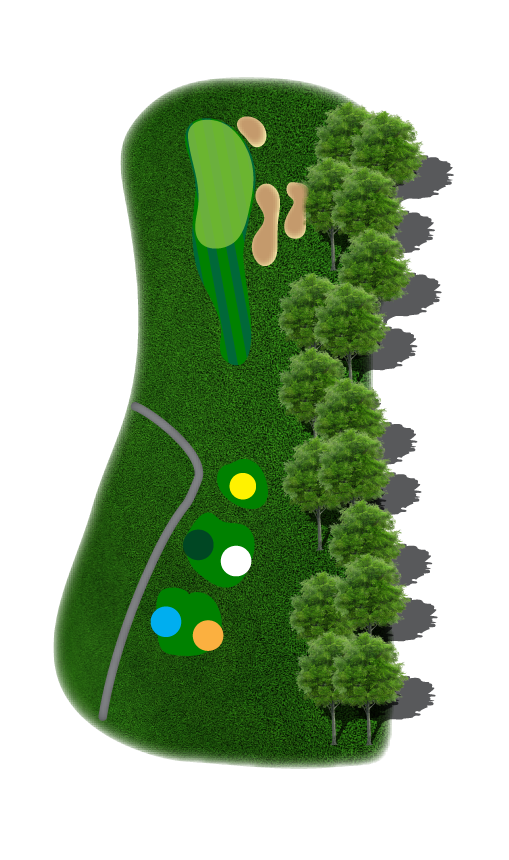
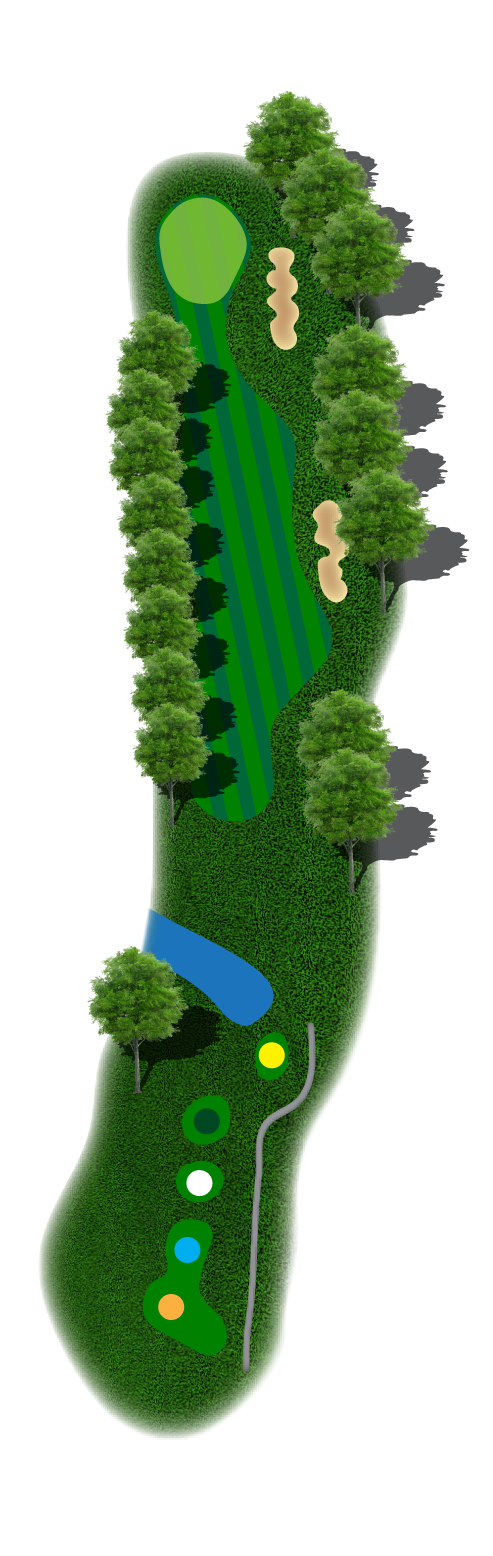
HOLE 2 – PAR 4
The Clarks: Club selection is key. Longer drives will find the water. Slightly elevated green—misses long or right make for a tough up-and-down.
Gold: 390 | Blue: 340 | White: 325 | Red: 300 | Yellow: 275
Handicap: 5

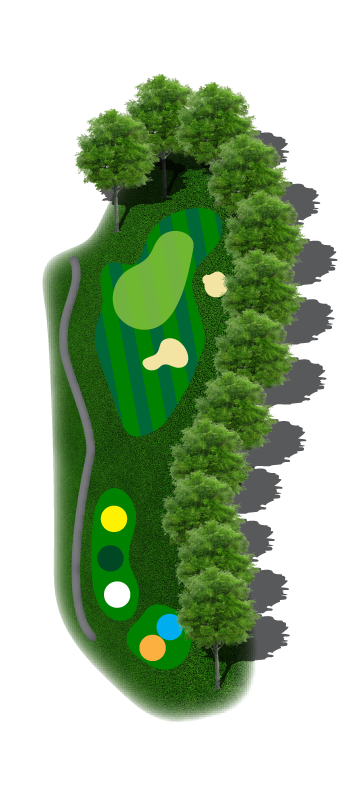
HOLE 3 – PAR 5
The Robertsons: Reachable in two for long hitters, but a layup often pays off. Rolling fairways lead into a small, contoured green.
Gold: 550 | Blue: 530 | White: 500 | Red: 485 | Yellow: 425
Handicap: 13
HOLE 4 – PAR 3
The Stewarts: Downhill. Wind is often a factor; club selection is key—don’t chase pins. Middle of the green is your best play.
Gold: 170 | Blue: 160 | White: 145 | Red: 125 | Yellow: 100
Handicap: 11

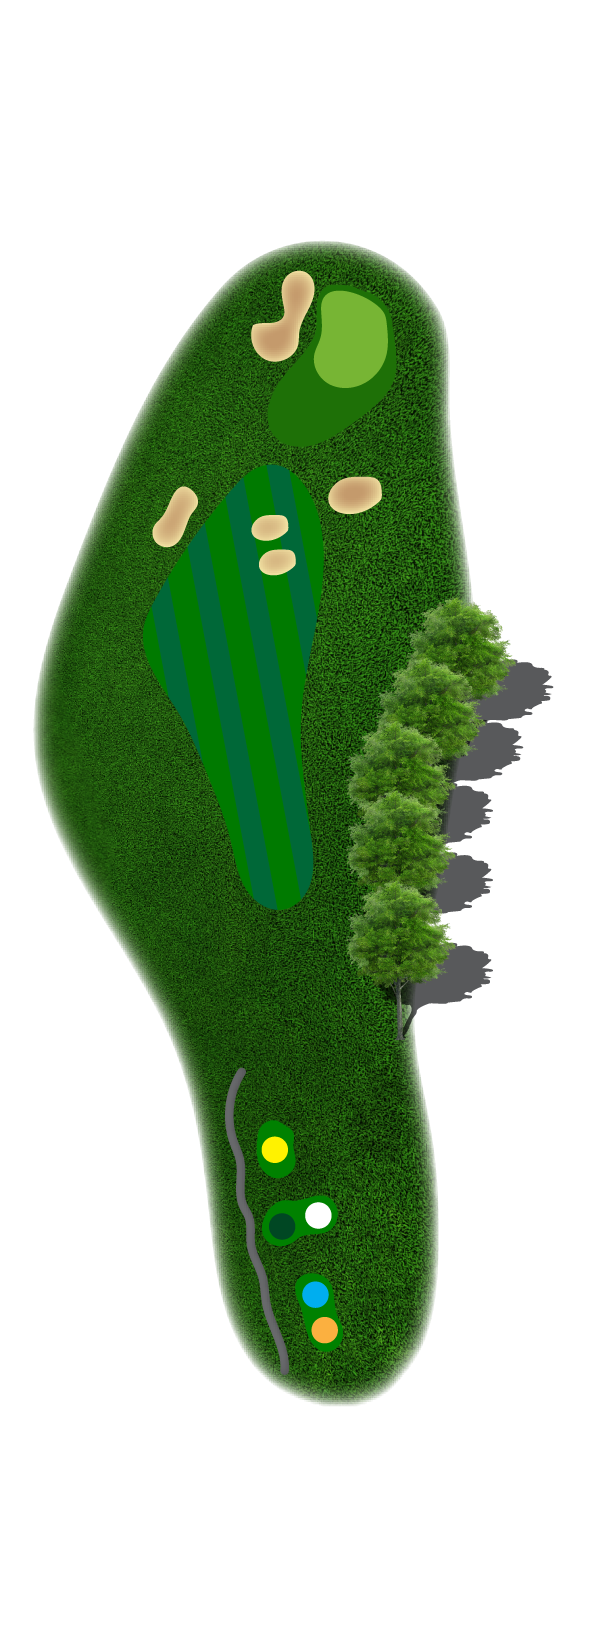
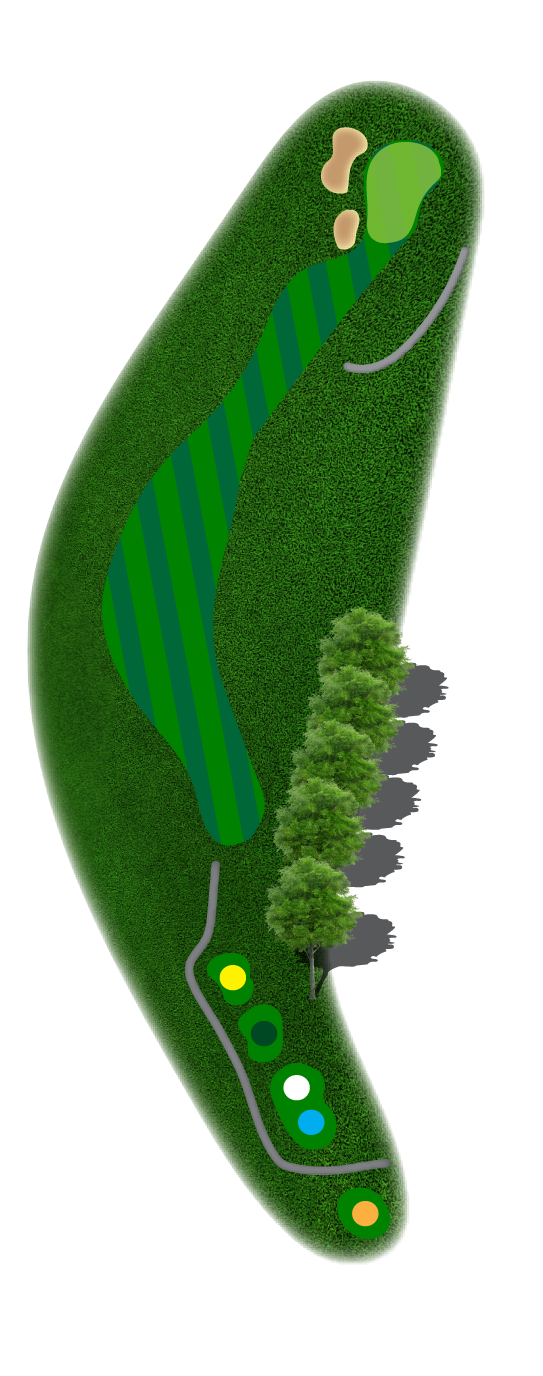
HOLE 5 – Par 4
The MacNeills: Generous off the tee, but bunkers guard the landing area. Approach bends to the left to a deep, slightly hidden green.
Gold: 390 | Blue: 360 | White: 345 | Red: 310 | Yellow: 295
Handicap: 7
HOLE 6 – PAR 3
The Mackenzies: Elevated and demanding. Narrow green, bunkers right, large mounds left—pick your line and trust it.
Gold: 170 | Blue: 160 | White: 135 | Red: 115 | Yellow: 95
Handicap: 9

HOLE 7 – PAR 4
The Webbs: Short par four. Position off the tee sets up the approach, avoid the gullies. A narrow, multi-tiered green is well protected with deep bunkers.
Gold: 320 | Blue: 310 | White: 285 | Red: 275 | Yellow: 245
Handicap: 17

HOLE 8 – PAR 5
The Maclures: Definition of a three-shot hole. Carry the valley and avoid the bunker off the tee. The 2nd shot needs accuracy to avoid trees and bunkers. Another large valley guards the green
Gold: 605 | Blue: 590 | White: 575 | Red: 510 | Yellow: 495
Handicap: 1

HOLE 9 – PAR 4
The Greens: Long and uphill par four. This hole plays longer than yardage suggests. Take extra club into a deep, elevated green.
Gold: 480 | Blue: 435 | White: 415 | Red: 395 | Yellow: 315
Handicap: 3

HOLE 10 – PAR 4
The Grahams: Dogleg right. Tee shot down the hill requires accuracy. Large hazard to carry into the clover-shaped, undulating green.
Gold: 420 | Blue: 395 | White: 370 | Red: 350 | Yellow: 325
Handicap: 2
HOLE 11 – PAR 3
The Maccoubreys: Short par three. Take enough club to clear the front bunker. Not much room to go long, so distance control is key.
Gold: 130 | Blue: 120 | White: 110 | Red: 100 | Yellow: 90
Handicap: 14

HOLE 12 – PAR 5
The Stevensons: Don’t be fooled by the distance. Find the gap on your second or third shot. Sloping green from back to front—watch the speed.
Gold: 545 | Blue: 515 | White: 490 | Red: 470 | Yellow: 420
Handicap: 12
HOLE 13 – PAR 4
The Beals: Short par 4 to a blind green. Tempting off the tee, but better to lay back short of the bunkers. Small green—don’t go long.
Gold: 350 | Blue: 320 | White: 290 | Red: 275 | Yellow: 250
Handicap: 16
HOLE 14 – Par 4
The Cullens: Subtle dogleg right. Left is trouble. Find the fairway to set your angle into a deep, well-guarded green.
Gold: 380 | Blue: 350 | White: 340 | Red: 315 | Yellow: 295
Handicap: 10

HOLE 15 – Par 5
The Toombs: Downhill, reachable par 5. Birch trees split the fairway—right side sets up best. Fairway runs downhill to a spacious yet challenging green.
Gold: 505 | Blue: 495 | White: 485 | Red: 460 | Yellow: 420
Handicap: 18
HOLE 16 – Par 4
The Lairds: Drive over a small pond to a narrow fairway—accuracy is key. Deep, raised green allows a run-up. Cannot go long with approach.
Gold: 395 | Blue: 380 | White: 360 | Red: 340 | Yellow: 310
Handicap: 6
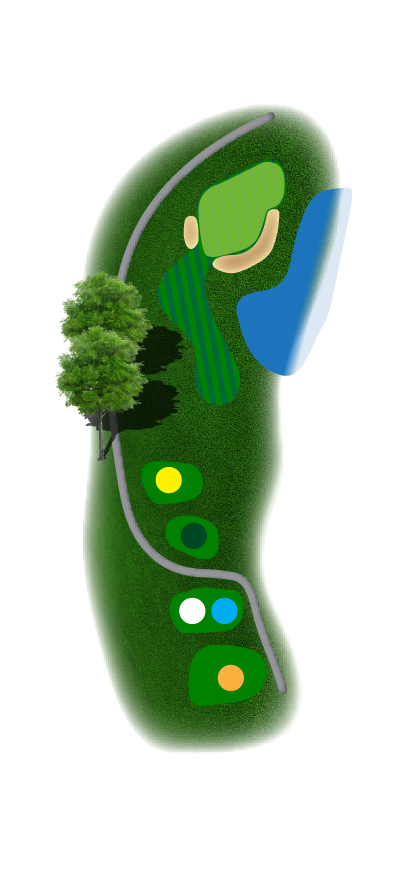
HOLE 17 – Par 3
The Moores: Challenging, yet stunning par 3. Water and bunkers guard the green—play to the middle.
Gold: 175 | Blue: 145 | White: 140 | Red: 125 | Yellow: 105
Handicap: 8

HOLE 18 – Par 4
The Wyands: Water runs the length of the hole. Generous off the tee, but a deep, well-guarded green awaits.
Gold: 450 | Blue: 425 | White: 415 | Red: 380 | Yellow: 345
Handicap: 4